Sunday, July 21, 2013

Master Bathroom

 
It has been awhile since we actually finished the
upstairs bath.  But, I never posted
any of the pictures.  It took a long time
to finish and was actually a part of
the upstairs new addition.
This is what the bath used to look like.
 
 
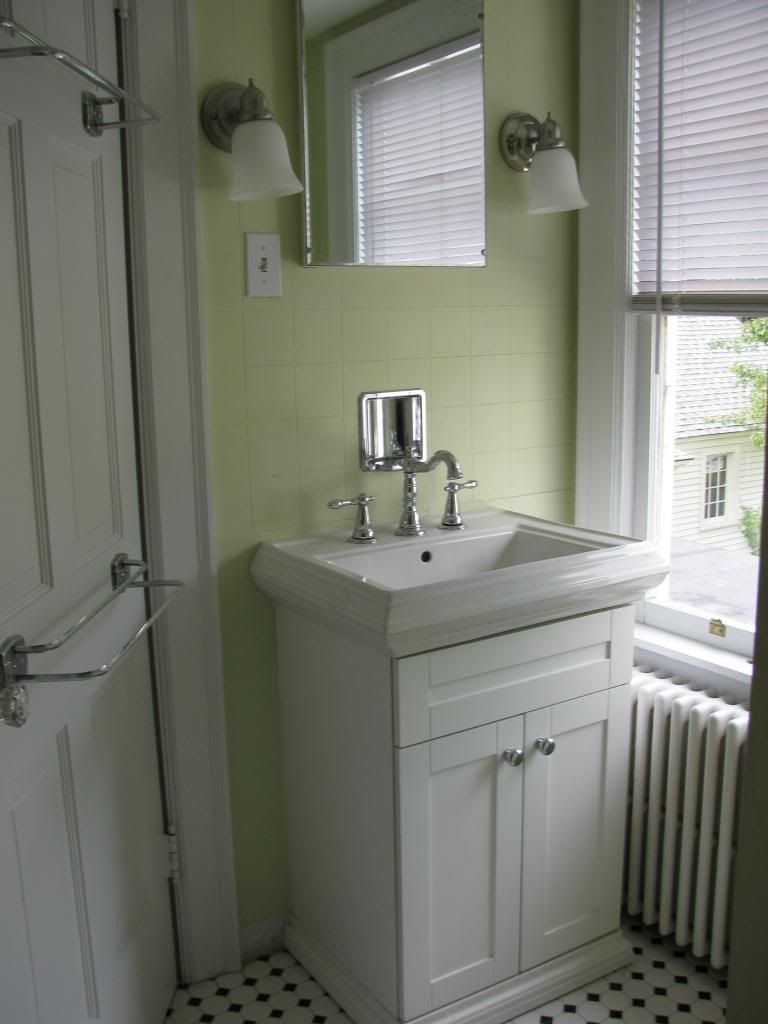
It was cute but also
 really, really tiny!!
 
 
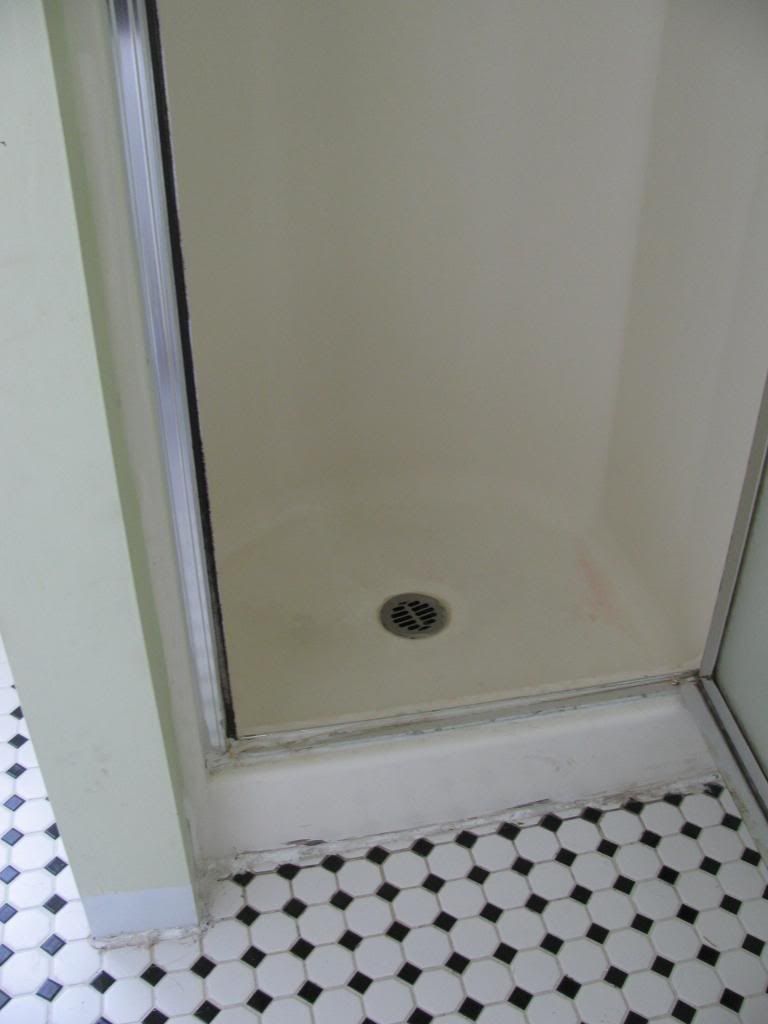
The shower was like a cruise ship shower.
It leaked around the bottom of the door.
The floor was old vinyl and pretty banged up.

 
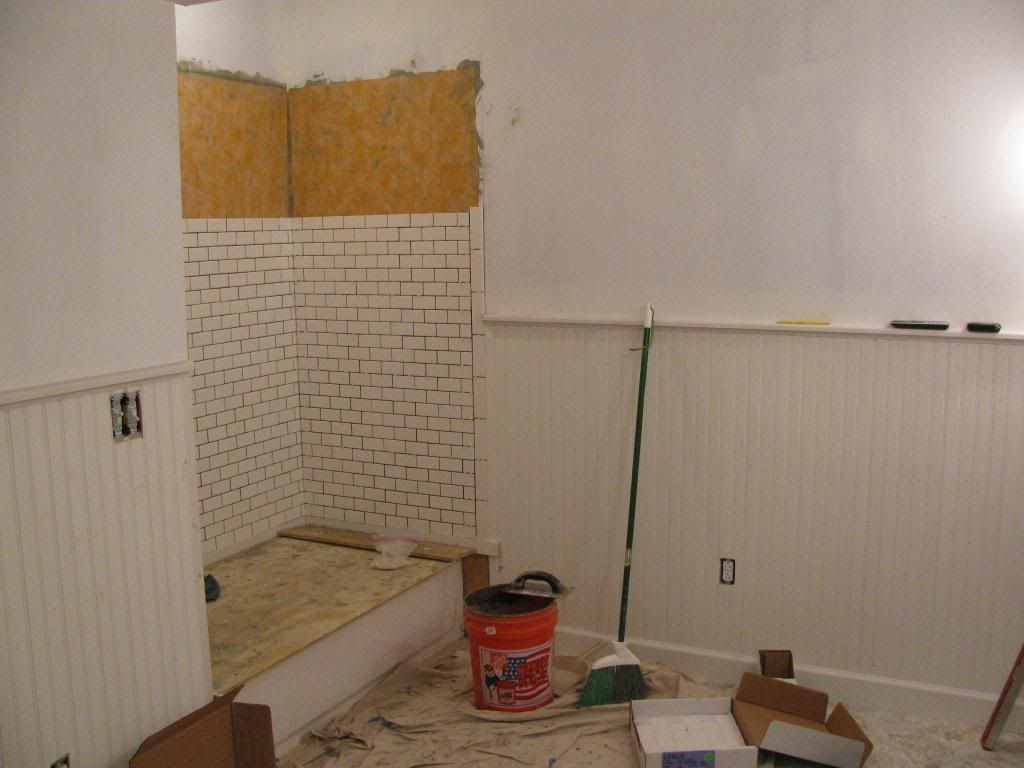
The new addition added twice the space to the bath
but we had to lose the window.
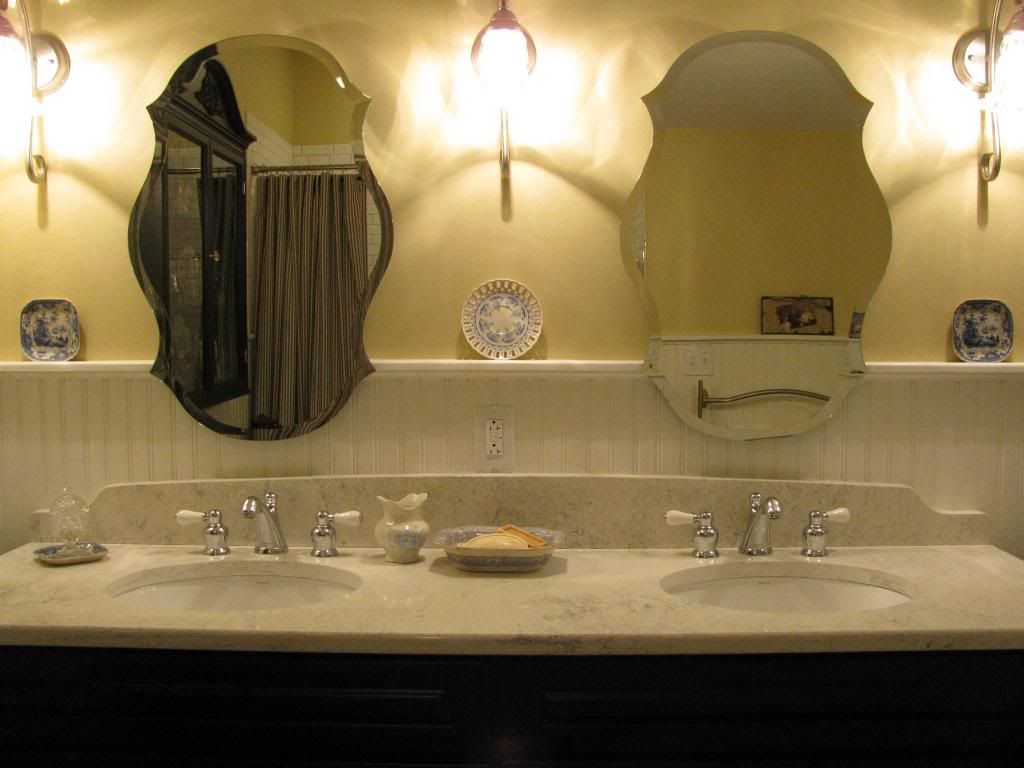
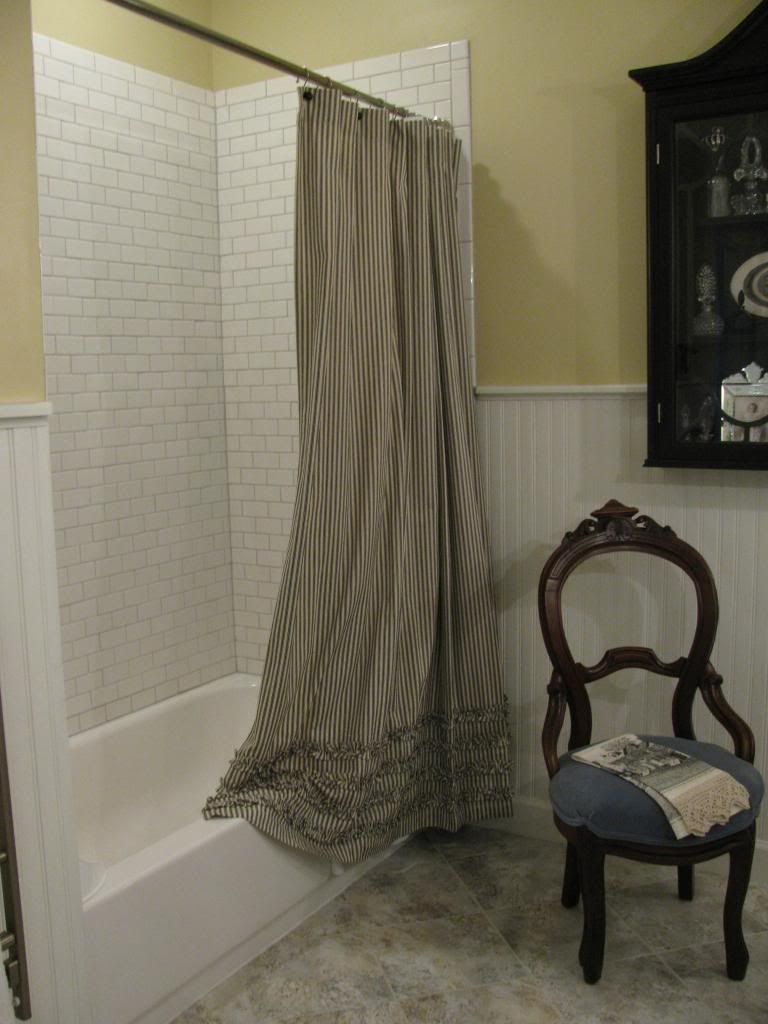
This is the subway tile for the tub/shower and
bead board for the walls.
Mike added a nice ledge around the top
of the bead board, he also did all the tile work.
 
 
Grey stone for the floor.
 
 
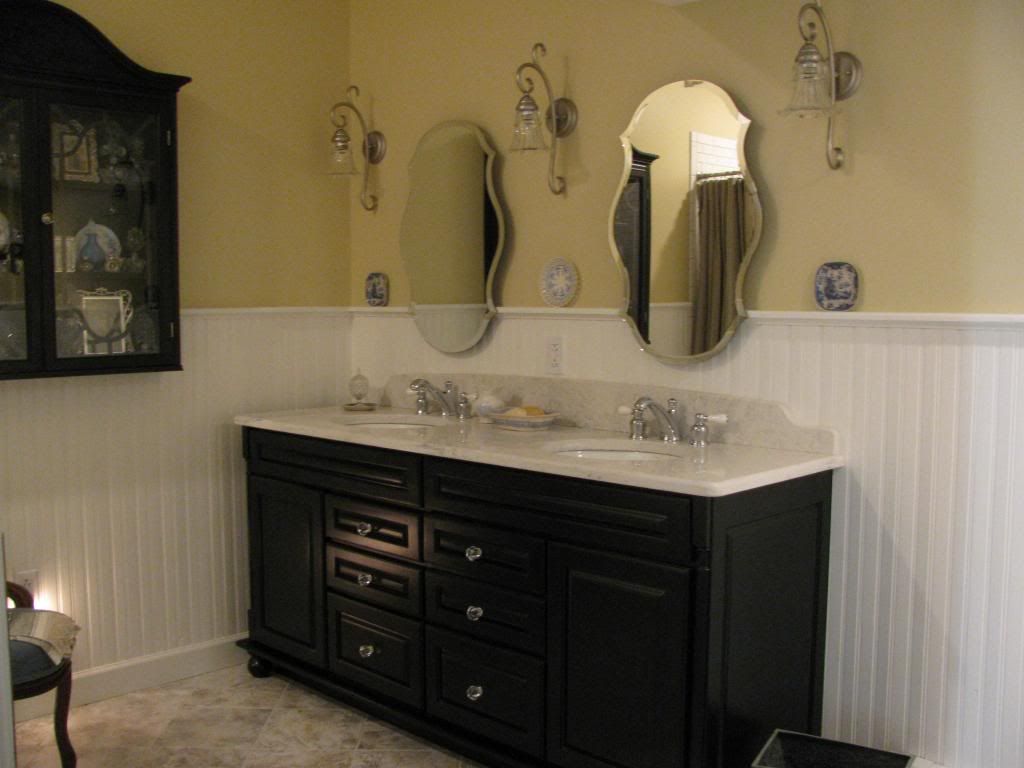
The upper wall is a caramel color.
The contractor made the cabinetry, he
did a wonderful job.


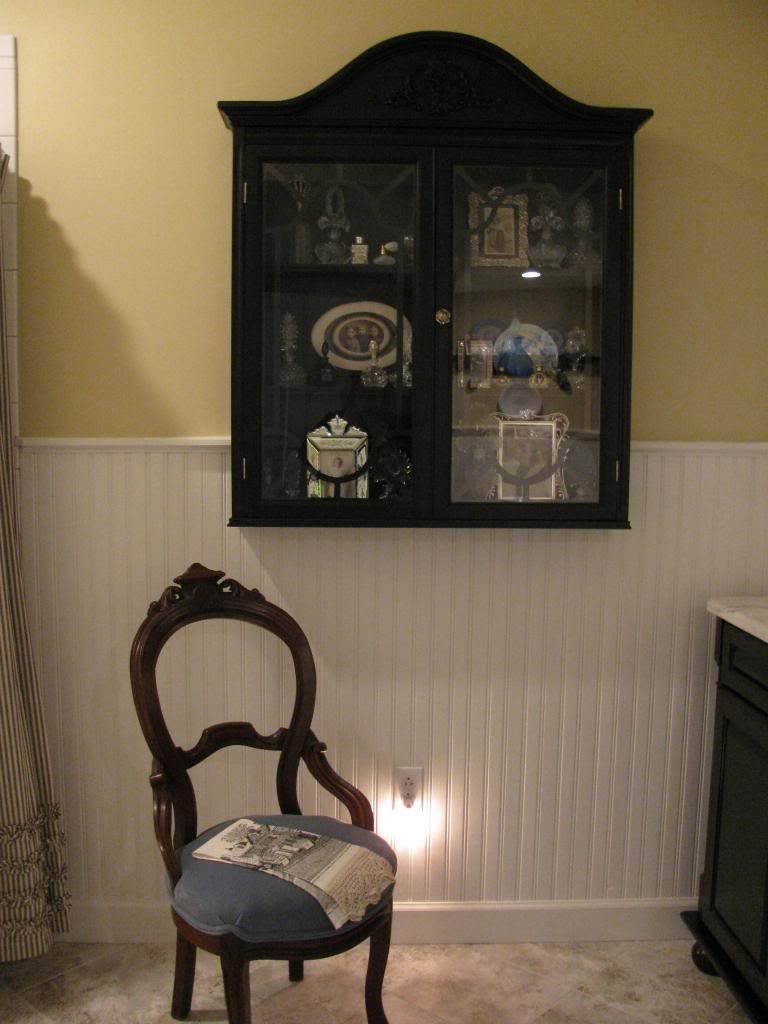
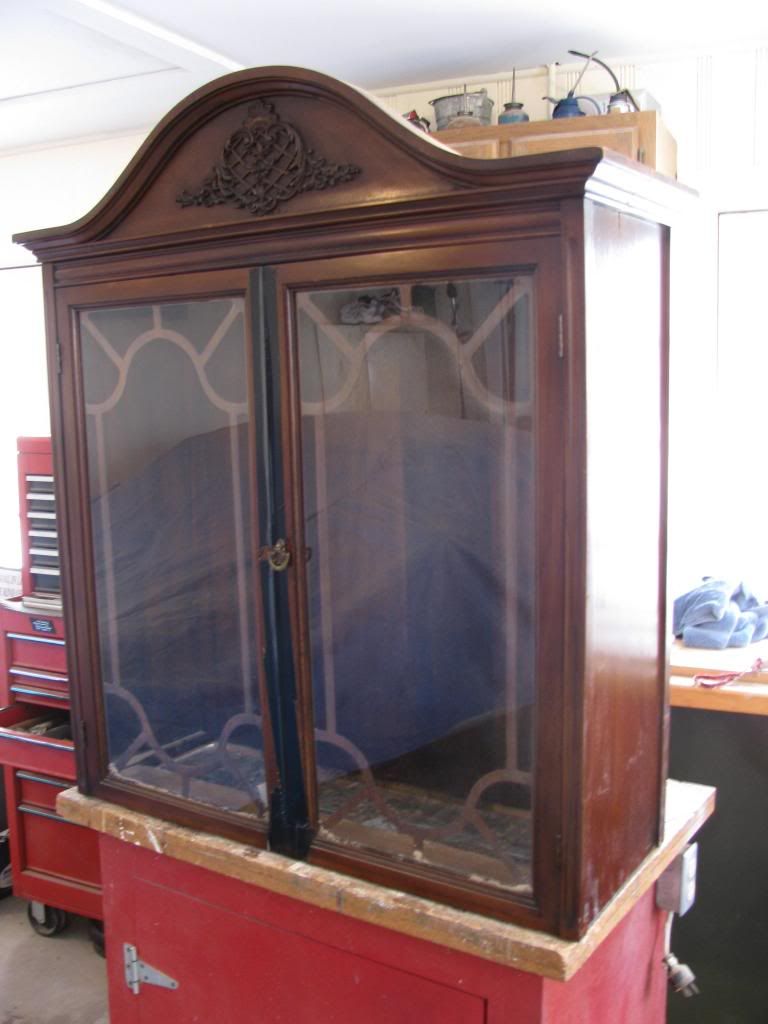
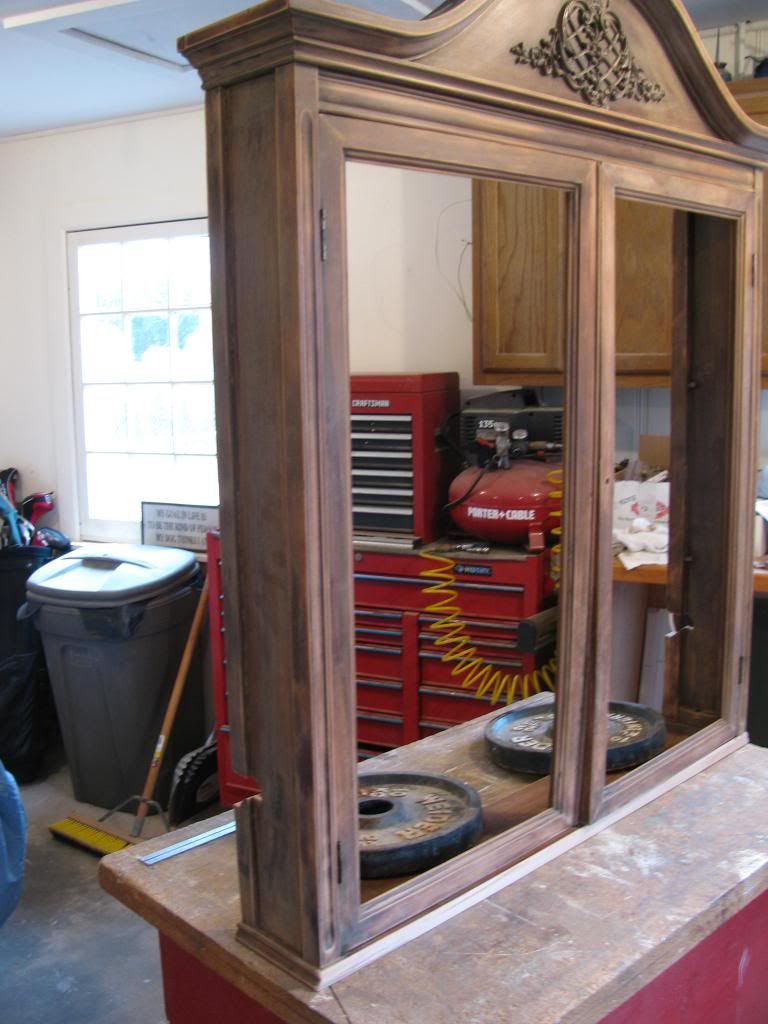
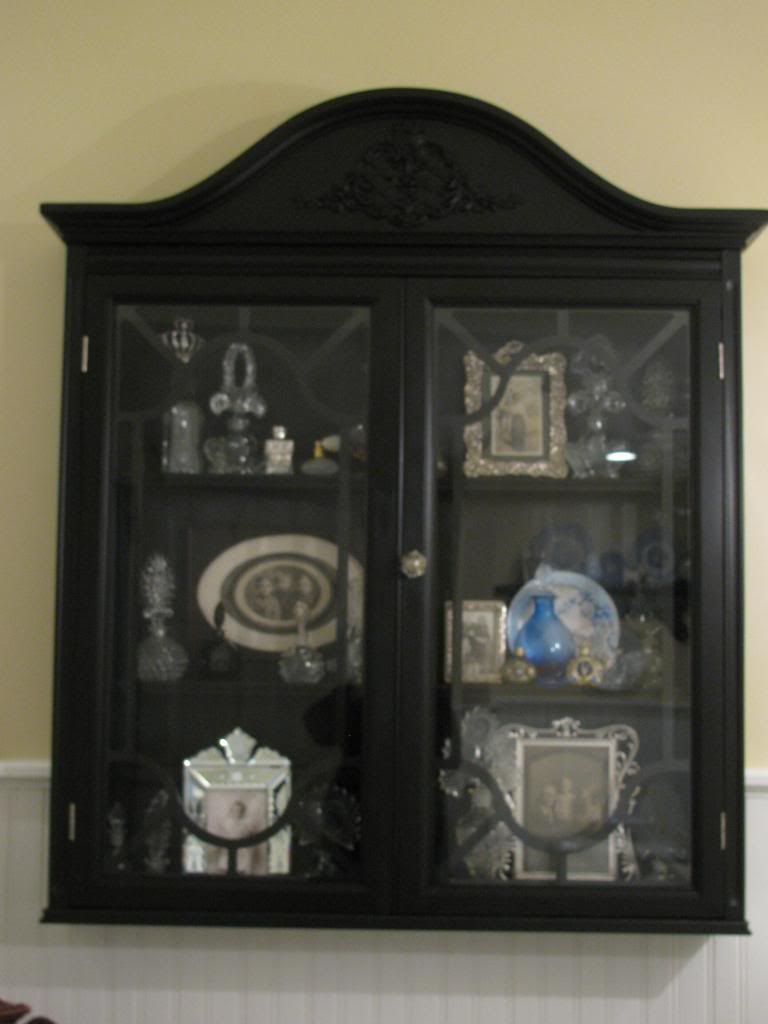
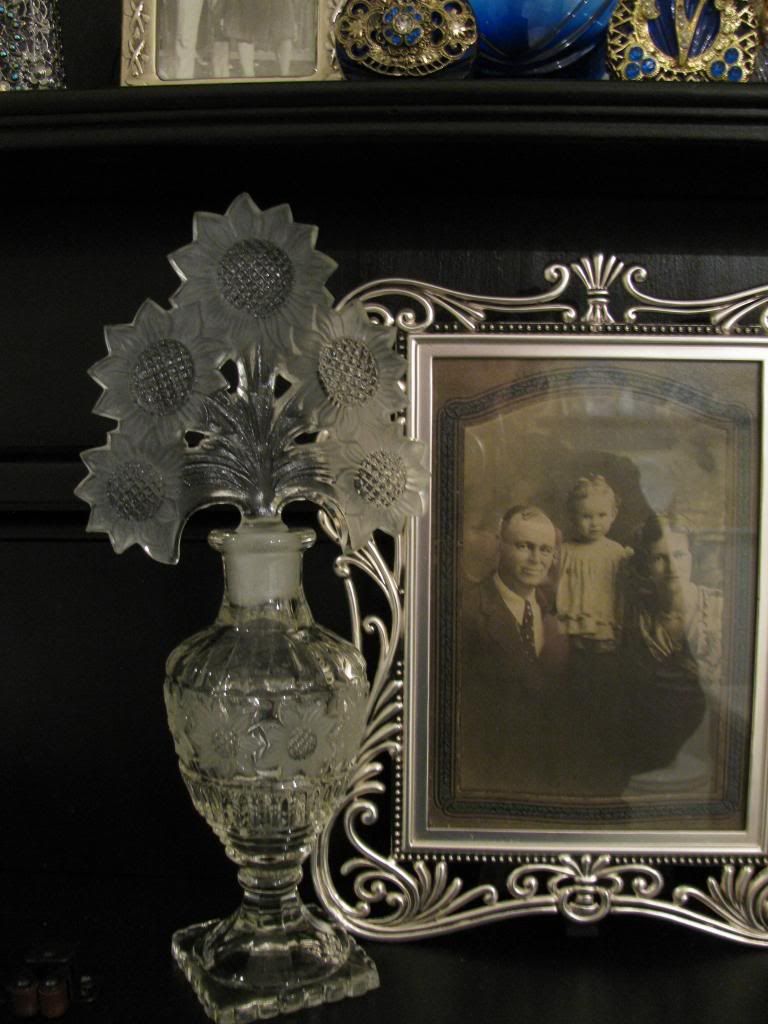
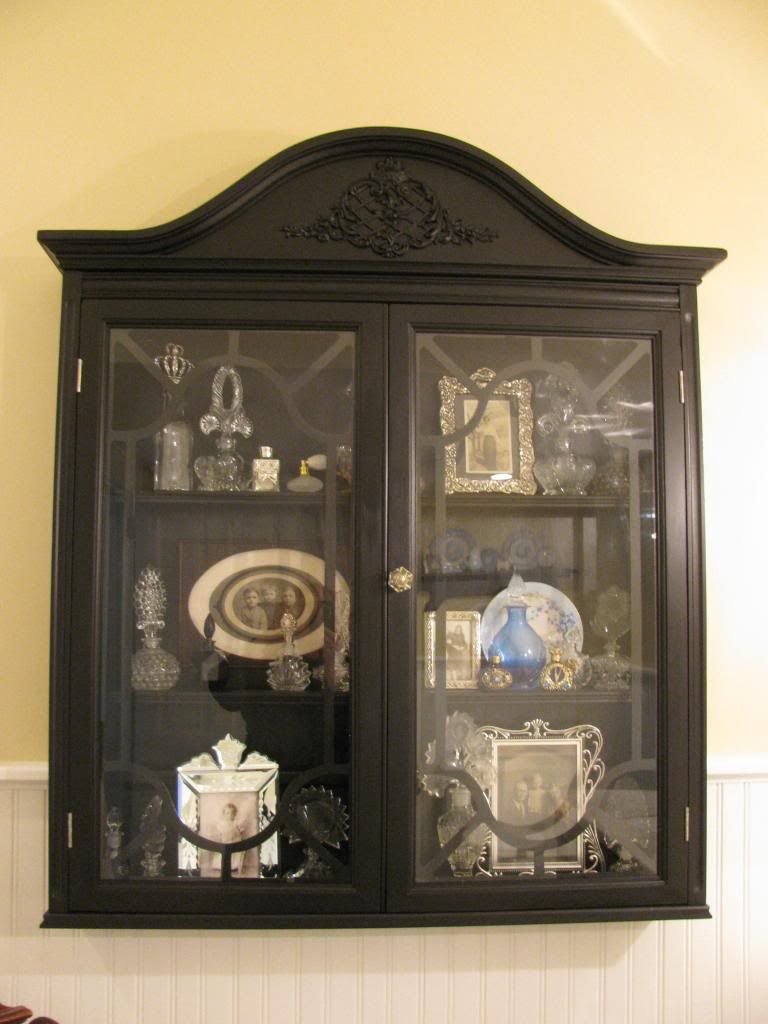
The perfume bottle cabinet.


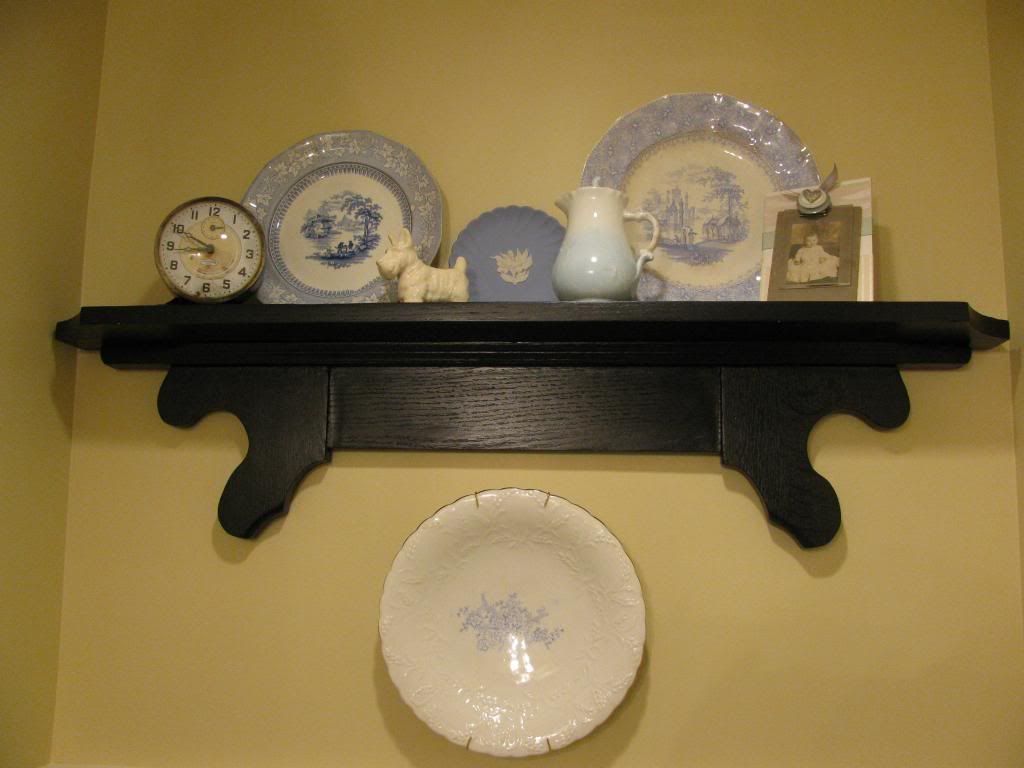
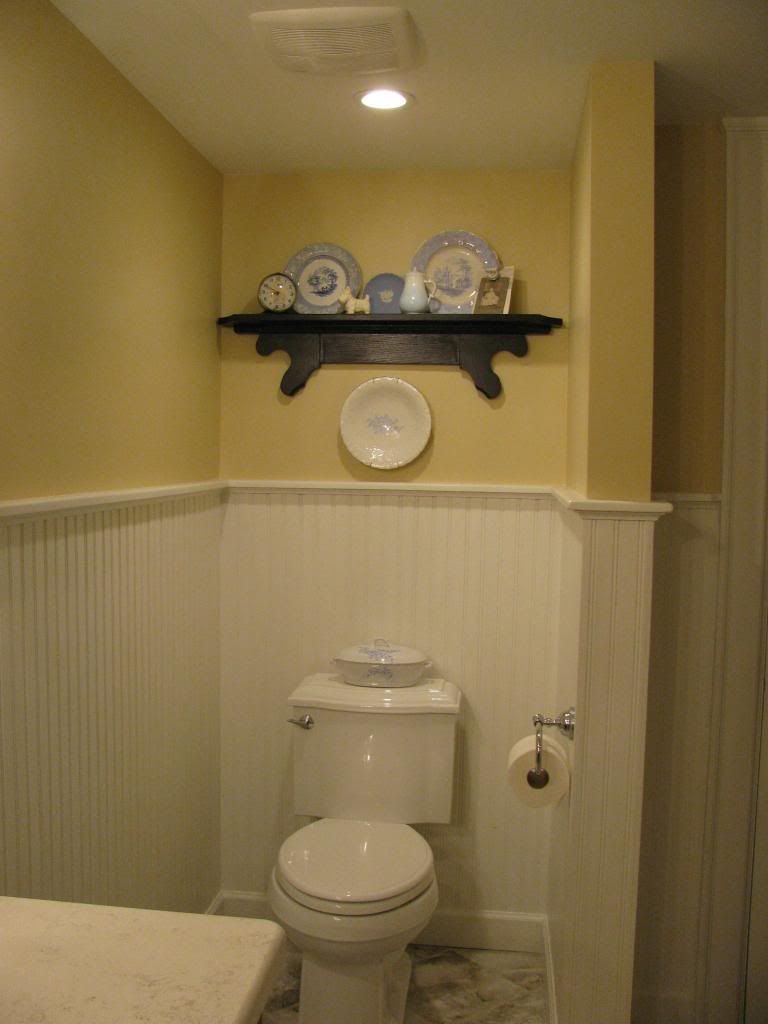
Old shelf over the toilet.
 
 
Hope you like the bath. 
Mike did a wonderful job taking
an empty room and turning it into
something really special.
People keep asking me
if  I rent him out :)
 
Have a great week.  Valerie


Friday, July 12, 2013

A Little More Bling for the Stairway Foyer


This was my inspiration,
 a three thousand dollar chandelier I saw in a magazine. 
Can't afford that!!  I would have to get a job for Mike.
 
 So I checked out our local junk store " Hokey Gees"
 and found an old 1970's chandelier with tons of crystals on it.
Wished I had taken a "before" picture but it was as big on the top
as below the "crown" part.  An ugly rusted gold color.
The picture below is after we took the top piece off.
 
 
We took it all apart and sprayed it with primer.
 
 
It had so many parts I had to take pictures to remember
where everything went.
 
 
Mike remembered we had a crystal piece left over
from another light fixture so we added that.
 
 
Then I went to work painting it to try and
match the inspiration piece.
 
 
Also painted a medallion for the ceiling.

 
Put back on all the crystals.....that took
forever......and this is our
version of the chandelier.
 
Sorry, I haven't posted in a while.  Too busy
travelling and enjoying Bedford.
 
Valerie 


Tuesday, April 9, 2013

Living room Sconces

 
Since we have had so many snow storms lately, a lot has been
going on on the inside of the house.
One of the best things about the living room fireplace is that
the mantle is wired for electricity.  I have always wanted
electrified sconces but most new homes don't put in
outlets for them.  We found two old sconces at
an antique store..... they were really old
and really dirty.  I think the style is called Art Deco
from the 1920's.


Pretty grimy. Old wiring.
 
 
Mike had to run the electrical wiring from the outlets
up the wall.  Then dry wall over the wires
 and then paint.
 
 
I cleaned up the sconces and put the first coat of
paint on.....a camel color.


Then I dry brushed a cream colored paint over
  the camel color. Next, dry brushed silver
over the
 raised places and the edges.
 
 
The fun part was making the candle cover.
I had seen on another blog how to make
a "drippy" looking candle cover using a
hot glue gun.  So I heated up the trusty
glue gun and dripped glue around and down
the sides of the cover.  I wasn't sure how the
glue was going to take paint but it did.
The paint stick like "glue." :)   I painted
the cover with the camel colored paint and
dry brushed the cream.  I was amazed how great
it looked. 
 
 
Next came the crystals (Mike had drilled very small
holes in the sconces.)
 
 
I am really pleased how great the sconces look and
had such fun with this crafty project.
 
Aren't you glad spring is finally here.
I am.
 
Valerie


Wednesday, April 3, 2013

A Little Glamour for the Staircase

 
Last month Mike and I went out to lunch in Somersett, Pa.
The restaurant was in an old mansion high on a hill. 
A coal baron had built it around the turn of the last century.
It had so many wonderful moldings and wood details.
One was this molding right below
each stair tread.  Isn't it spectacular?!!


Mike thought something like it would
look great on our stairway.  This is the way
it used to look. 
 
 
A closer look.
  
 
Mike was able to buy these wood details
on-line from an architectural company.
He nailed and glued them to each step.
Then a little paint.
 
 
Didn't it come out great!!
 
 
Now there's a little glamour for a nice stair case.
 
Sun is finally out here,  Hope it is sunny where you are!!
 
Valerie
 

Saturday, March 23, 2013

Spring in Pennsylvania?

Can't believe that this week is the beginning of spring. 
This is what it looked like at my house.
Winter just doesn't want to let go.
It was a beautiful snow though. 
Very heavy and hung to the
tree branches.  Lovely.
But I am ready for daffodils!!!!!!


Tuesday, March 5, 2013

Perfume Bottle Cabinet

One of Mike's latest handy works is this beautiful cabinet
 in our new master bathroom.
  We had bought an old china cabinet a while back. 
 I used the base for another project in our foyer.  So for
awhile we stored the top in the basement.  When we finished
the upstairs master bath we had this huge wall with nothing
to put on it.  I have a lot of antique perfume bottles that my
mother-in-law has given me for birthdays and Christmas's over the years
so the cabinet was just the right place for them. 
 
 
This is what it used to look like.  The color of cherry wood,
a bit scuffed up......it had seen better days.
 
 
It was too deep so Mike cut off about two thirds of the depth. 
Then he had to notch out the lower part of it so it would
 fit over the bead board part of the wall.
Next he put on some trim to hide the cut edges.
 
 
He painted the cabinet black to match the vanity cabinetry
 and added a pretty crystal knob for the door.
 
 
I put in the antique perfume bottles and added old
 family photos in silver frames. 
It is really a beautiful and unique piece in the bathroom
 
 
This is a picture of the bottom of the cabinet which is in the downstairs foyer.
 
Hope your week is going well.  We are waiting
for a big snow storm.  So I guess,
we will be spending tomorrow in the house.
 
Valerie
 

Sunday, February 17, 2013

Laundry Room

The laundry room is finally finished. 
 It has been a long, stop and start project. 
 It actually is a very small
(tiny, tiny) upstairs bedroom full of angles
and a slanted ceiling.  No closet, only an under
the eaves cubby and a couple of built in drawers.
The laundry room was actually in the basement but right
after we got the house I was dragging some sheets
down the staircase and took a tumble.  So we came up with
the idea of putting the laundry upstairs. 
And it has worked out great.  This what the room used to look like.
 
 
The plumber had to come in and put in pipes and drain.
Mike painted the room blue and white then
 put in lower kitchen cabinets and a counter top.


I made the curtain,
 
 
out of this fabric.
 
 
Added some "old things."
 
 
Made a laundry bag.
 
 
Mike added overhead spot lights.
 
 
I keep all my scrapbooking supplies in the cabinets.
And use the counter to work on projects.


At the other end of the room is our old
Hoosier cabinet.  This picture also gives you a good idea of what
a head banger the slanted ceiling used to be.
 
 
I still have a few decorator projects left to do, such
as paint the under the counter stool and I want to put another
old shelf above the washer and drawer.  Will show you
those projects after they are completed.
Have a great week.  We are supposed to get snow.
Valerie